So you have a WordPress website and want to install Google Analytics on it so that you can see your traffic numbers and goal completions; the only problem is that you have no clue how to setup it up. Sound familiar? If this is the case, you’re in luck as we’ve developed a quick guide that will have you tracking your website visitors in no time. Simply follow the steps below and within a few minutes, you should be up and running. If you have any questions, please use the form found below or you can contact our team directly. We have an award-winning web development team on staff too; so if you have further questions about your website, we’re happy to help! Just ask!
Guide: How to Setup Google Analytics on WordPress
We’ve laid out the process for setting up Analytics on a WordPress website to make it as easy as possible for you, but if you are stuck or confused don’t hesitate to reach out!
Step 1: Go to Google.com/analytics

- Click on the blue “Start for free” button in the top right side of the page
Step 2: Sign-up for Google Analytics
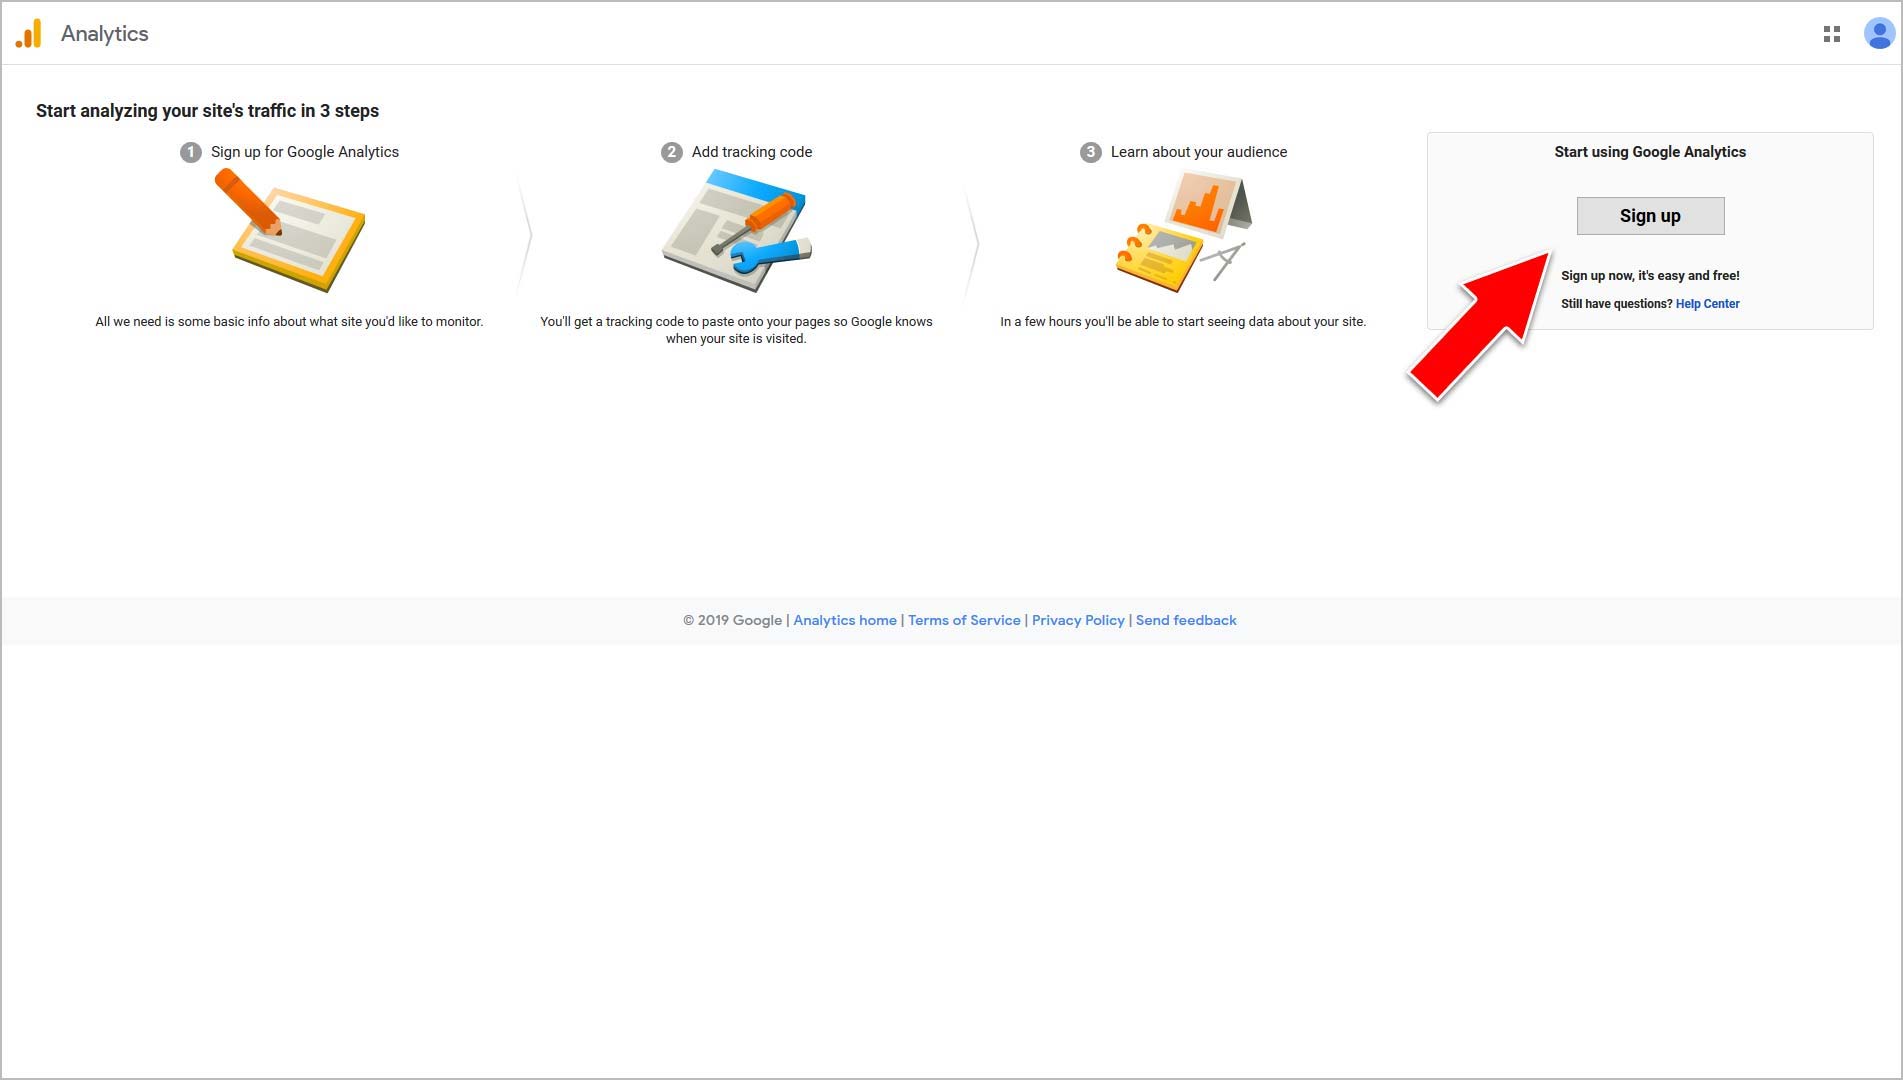
- Click on the gray “Sign up” button in the top right side of the page
Step 3: Enter Your Website Details
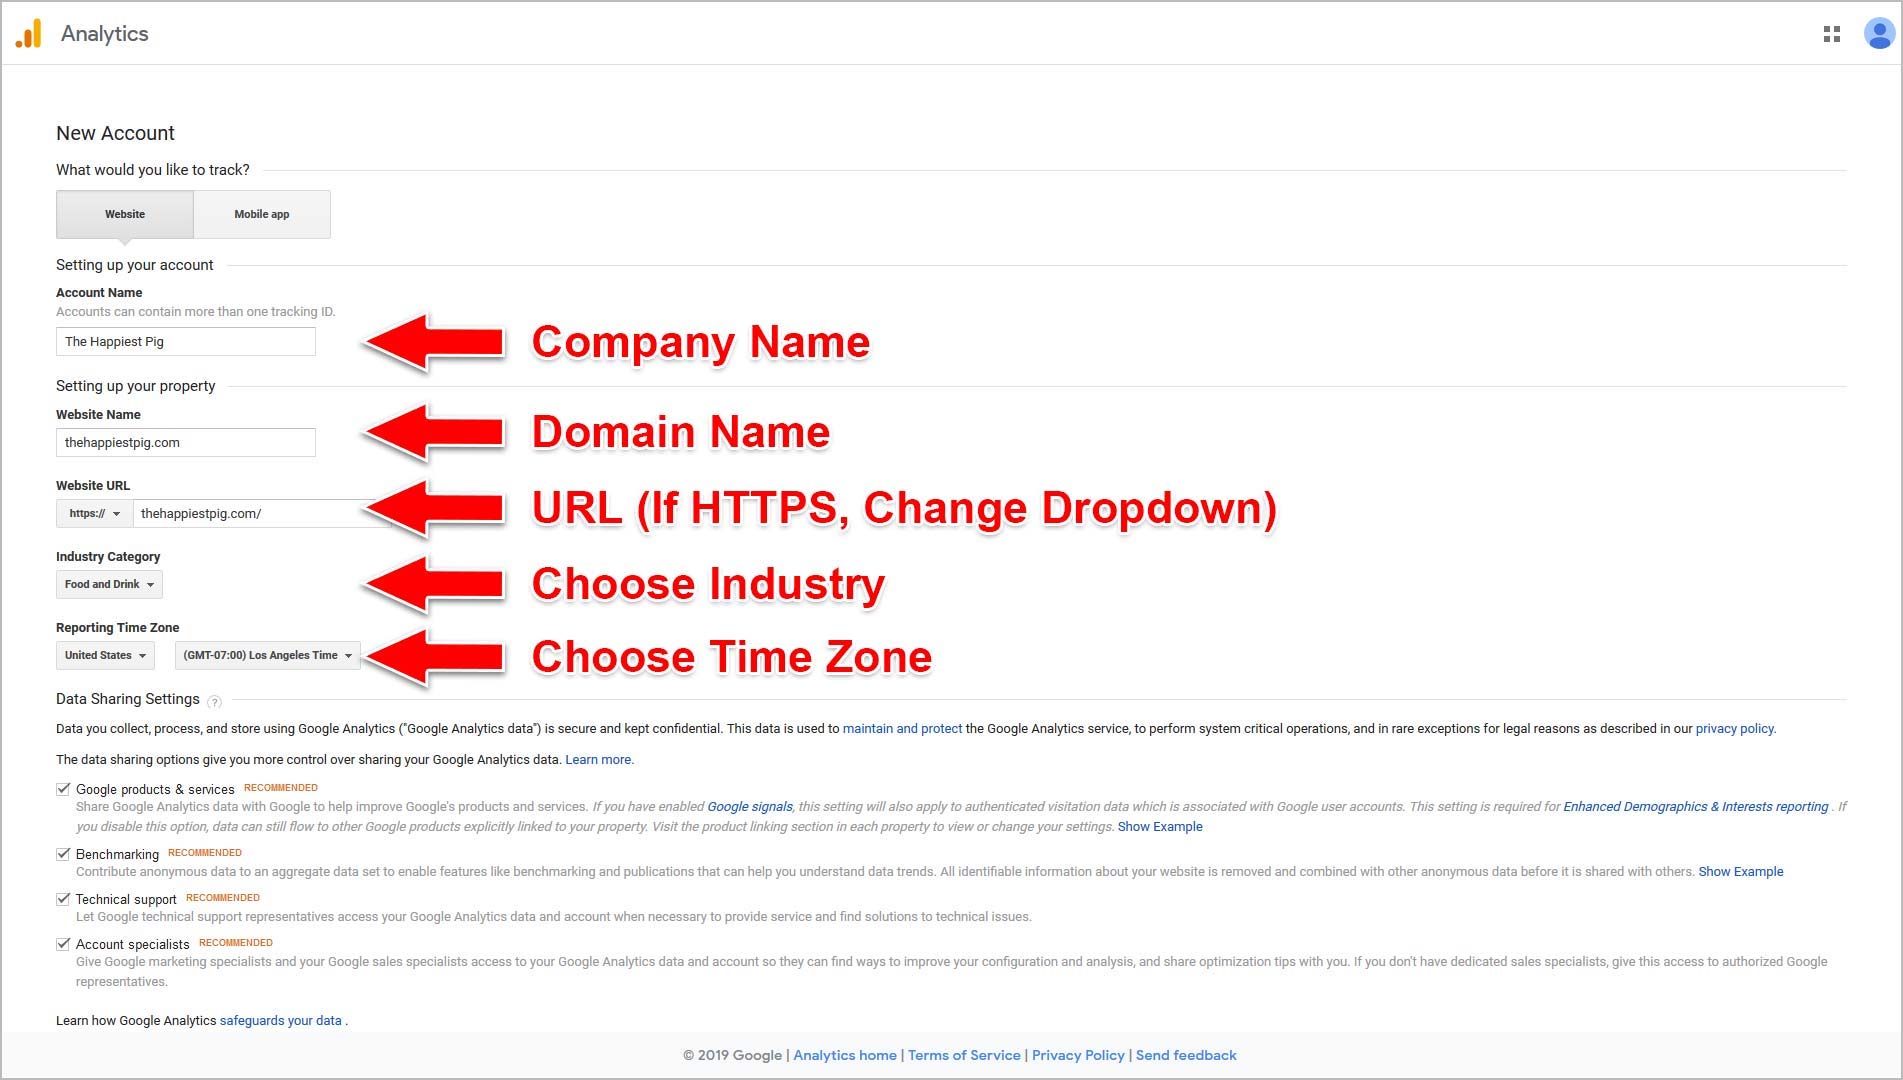
- Under “Account Name” enter your company name
- Under “Website Name” enter your domain name
- Under “Website URL” enter your domain name again (change the dropdown to HTTP if you have a secured website only)
- Under “Industry Category” select the option that best suits your business
- Under “Reporting Time Zone” select your time zone
Step 4: Accept Analytics’ Terms of Service Agreement
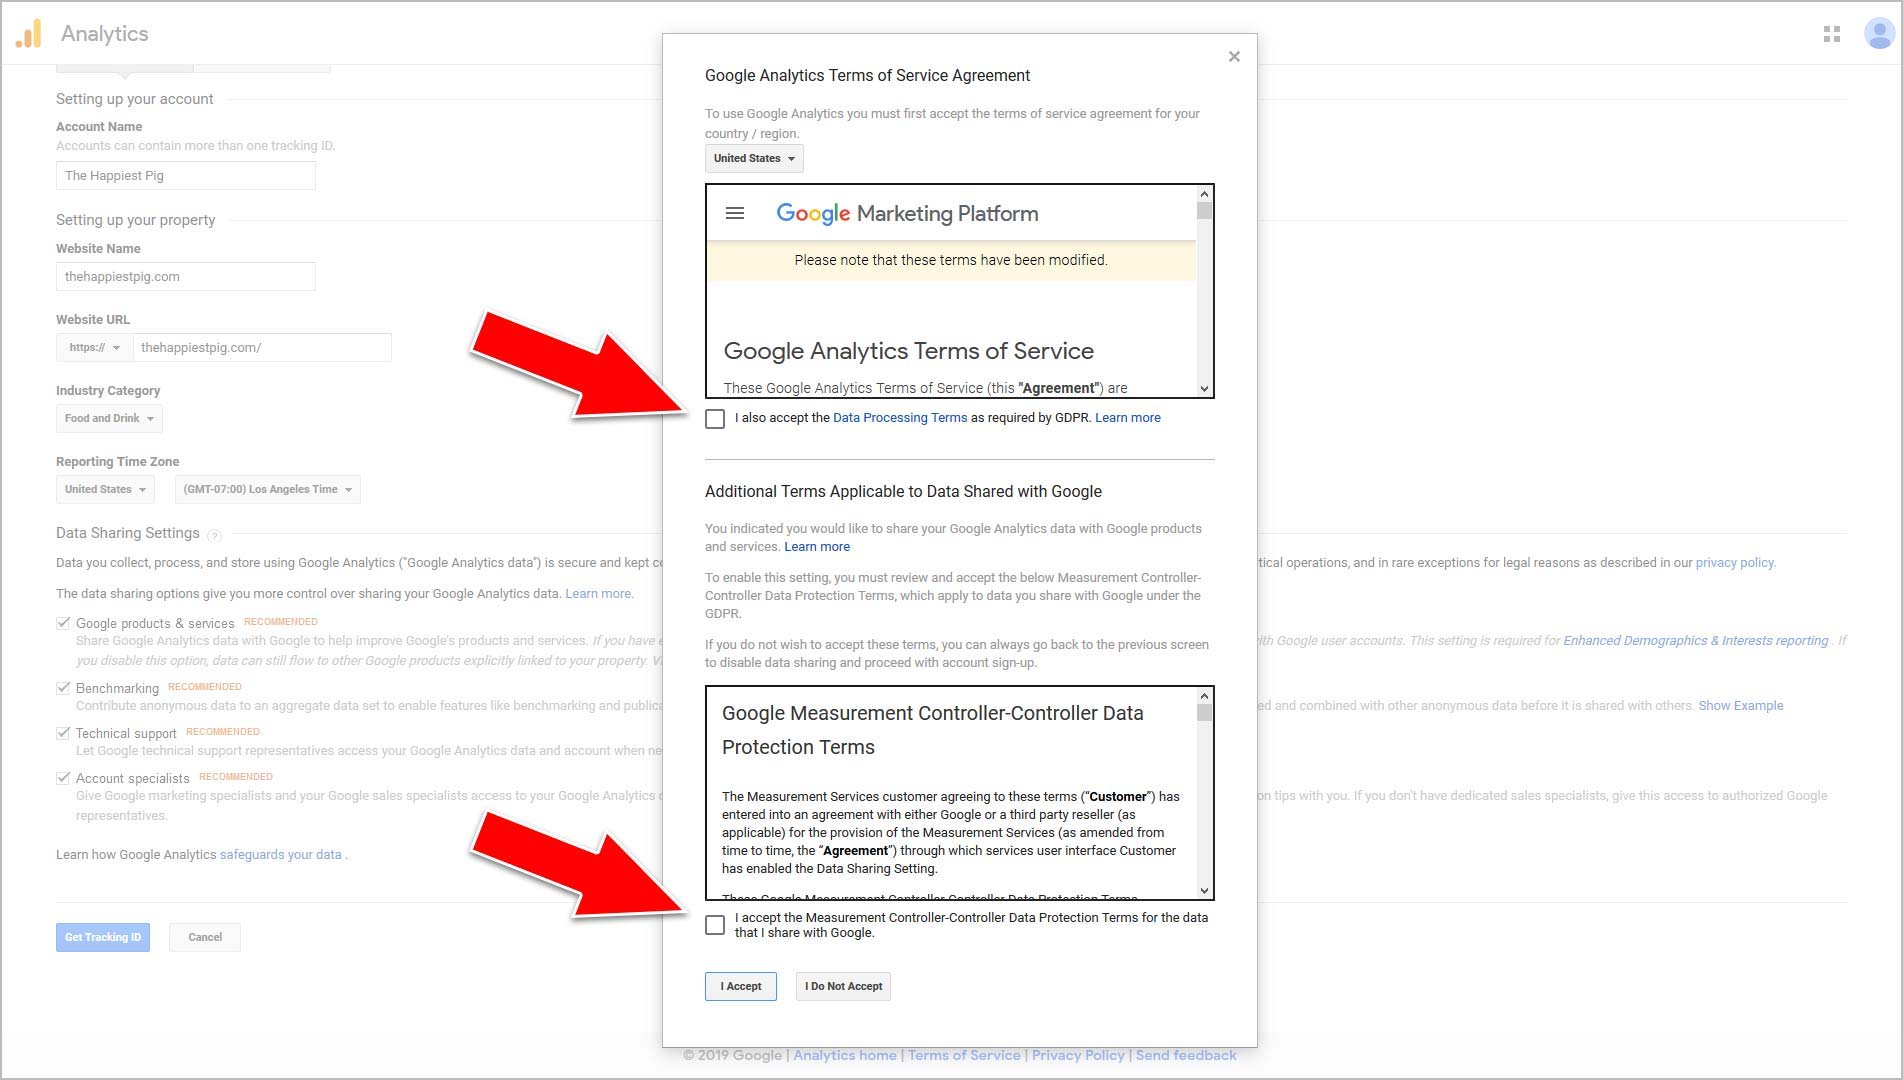
- Select the two check boxes and click the “I Accept” button
Step 5: Copy Your Google Analytics’ Script
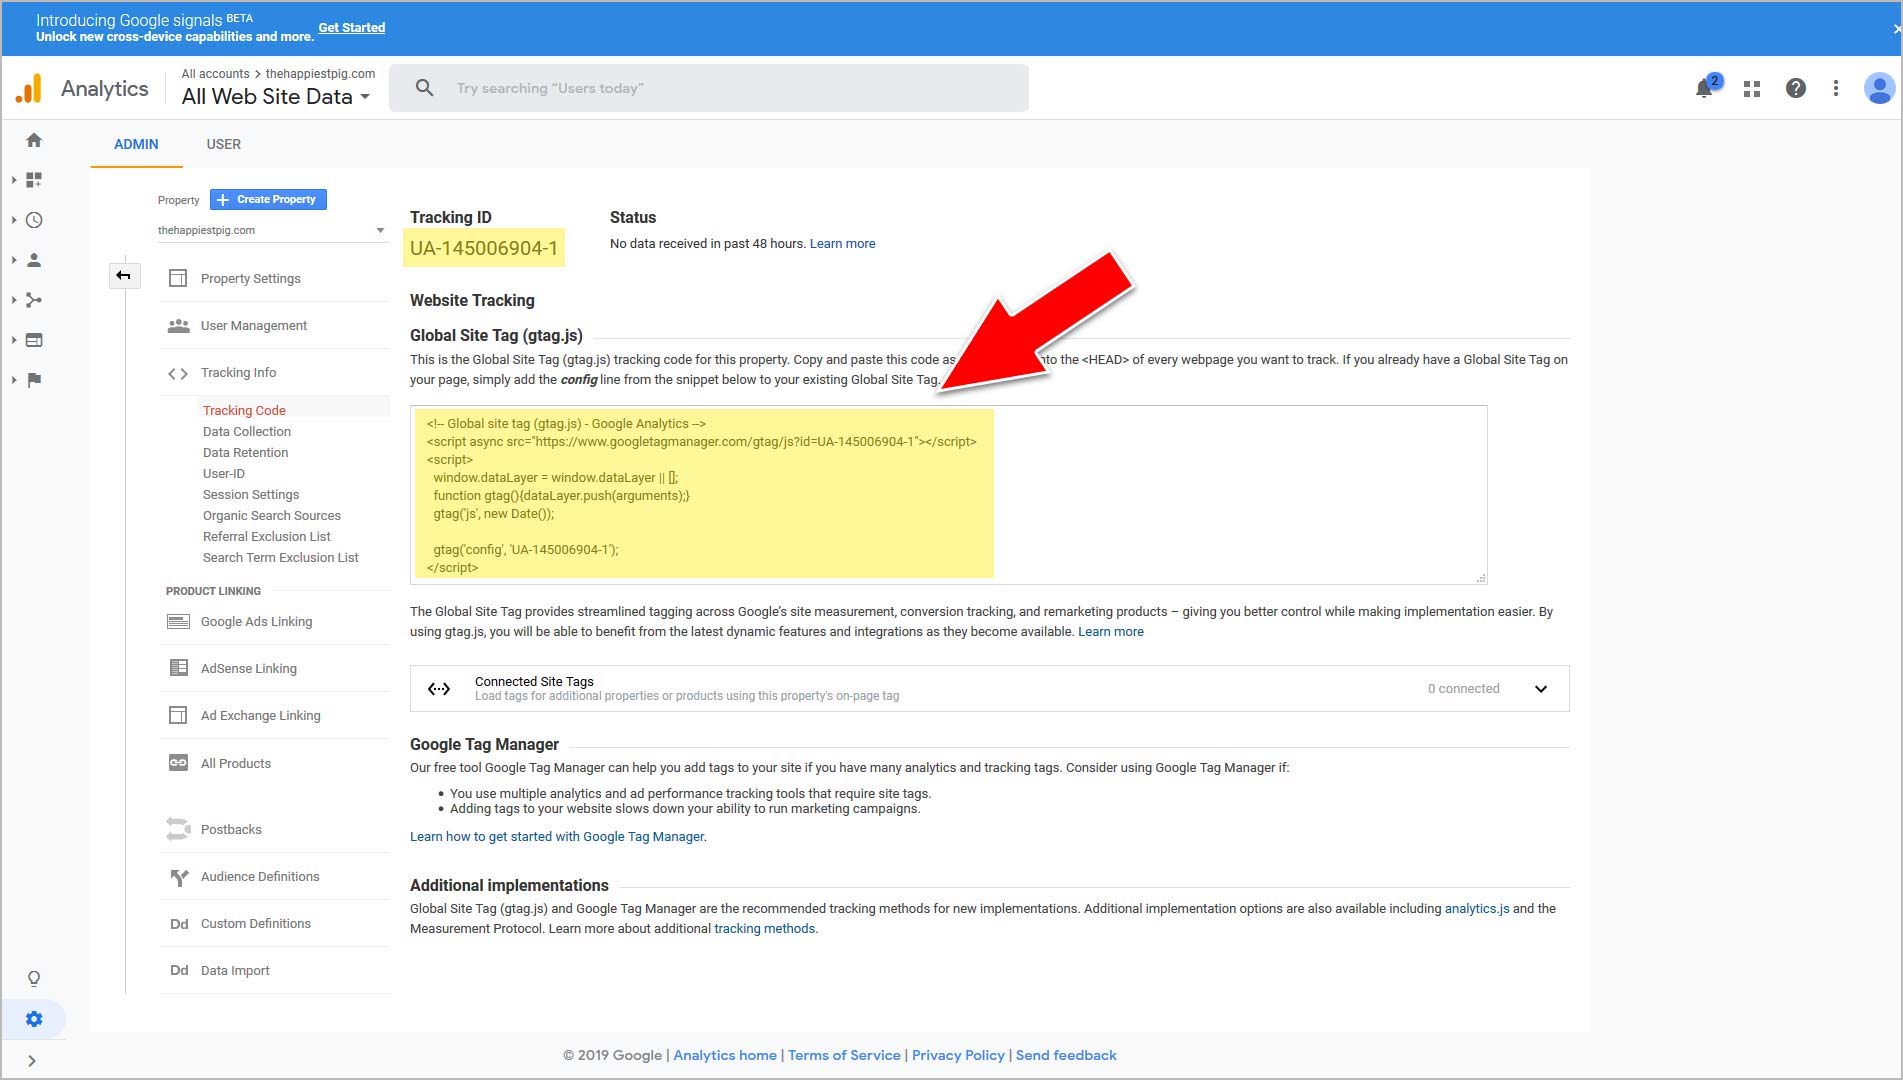
- Under “Global Site Tag (gtag.js) copy the entire script highlighted yellow (above)
Note: Some CMS platforms, including some themes used by WordPress CMS, will only require that you enter your Analytics’ Tracking ID (first series of letters and numbers highlighted yellow) to enable Analytics’ tracking.
Option 1: Add Analytics Script via Theme Editor
There are two common options for adding Analytics to your WordPress website – through the theme’s header.php and by using a plugin. First we’ll look at installing the script directly into the theme. If you are uncomfortable with editing theme files, we recommend you skip to Option 2. Furthermore, if you’re not using a child theme or a custom-built theme, you should skip to Option 2.
If you’re unsure of anything discussed in the above paragraph, skip to Option 2!
Step 1: Install Analytics Directly Into Your Theme File
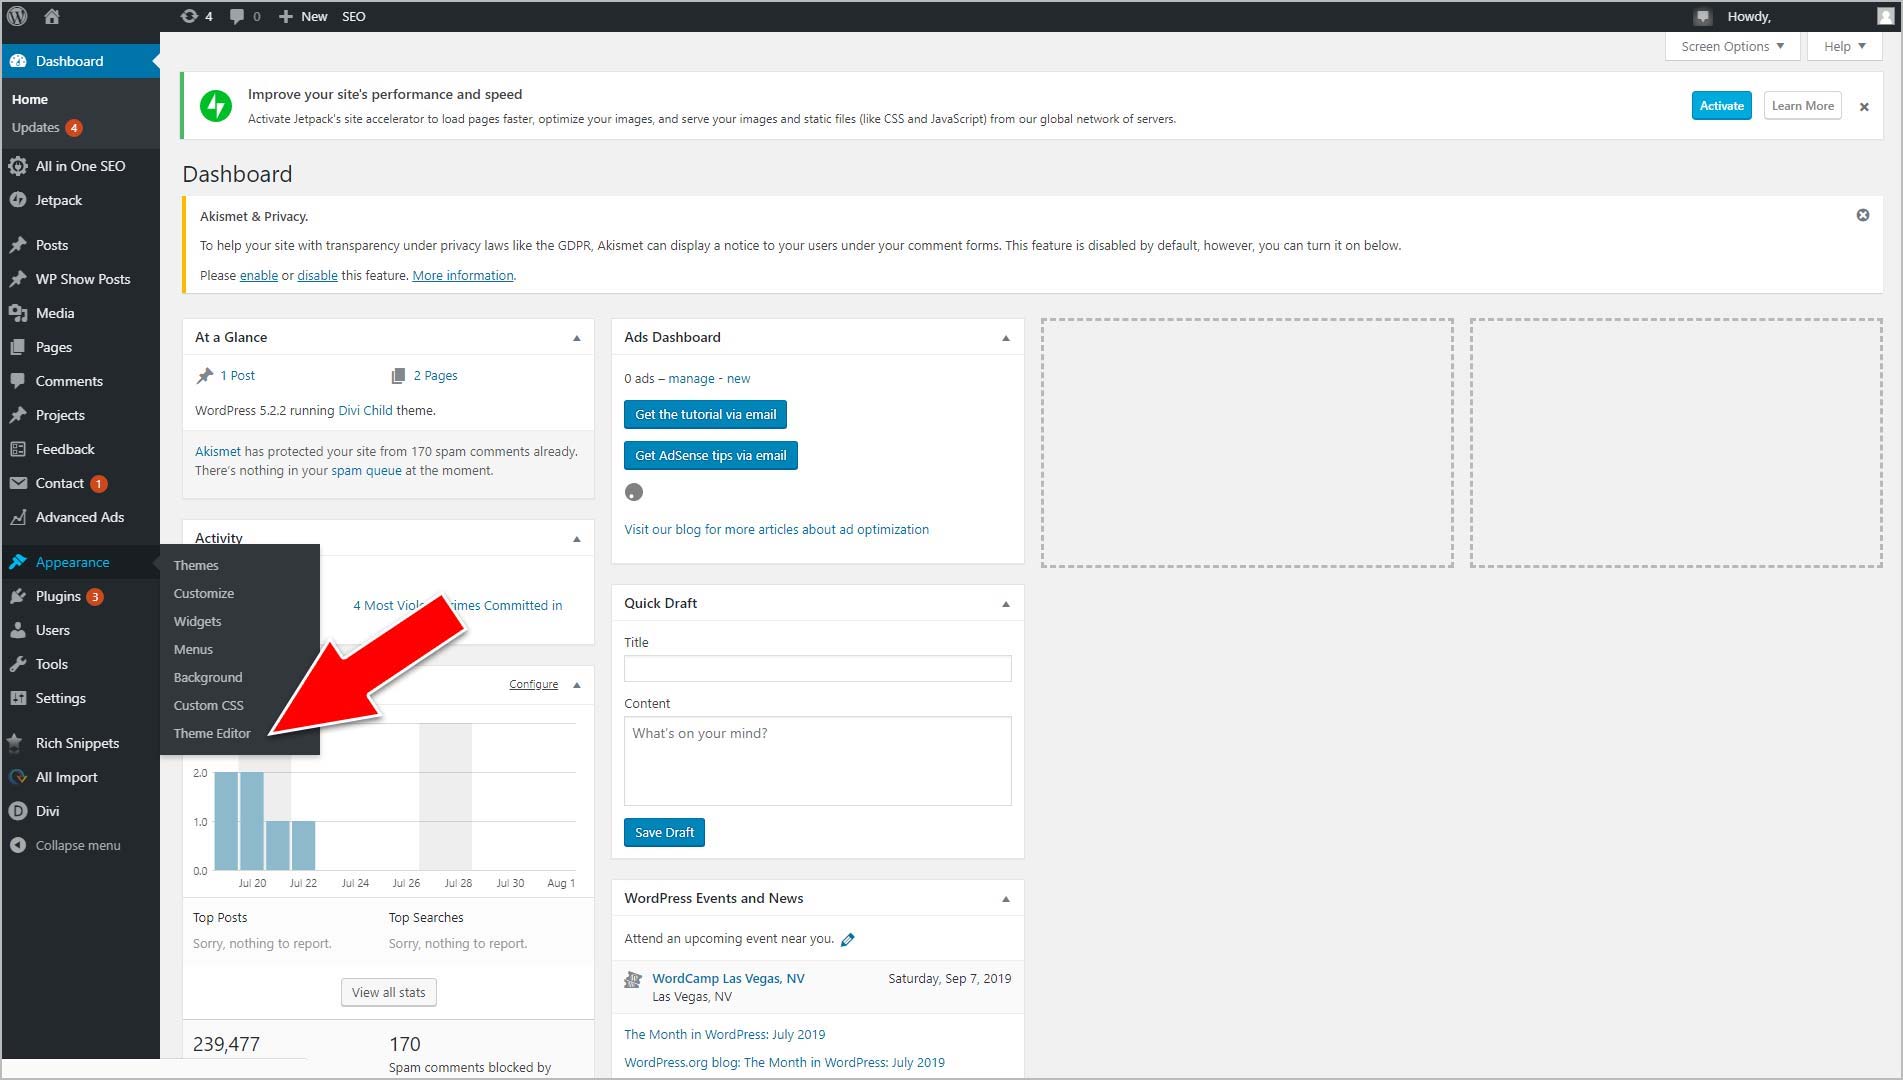
- Navigate to “Appearance” and hover over the option to expand the menu
- Click on “Theme Editor”
Note: Some WordPress themes will look slightly different, but most will use the same nomenclatures.
Step 2: Navigate to the header.php File
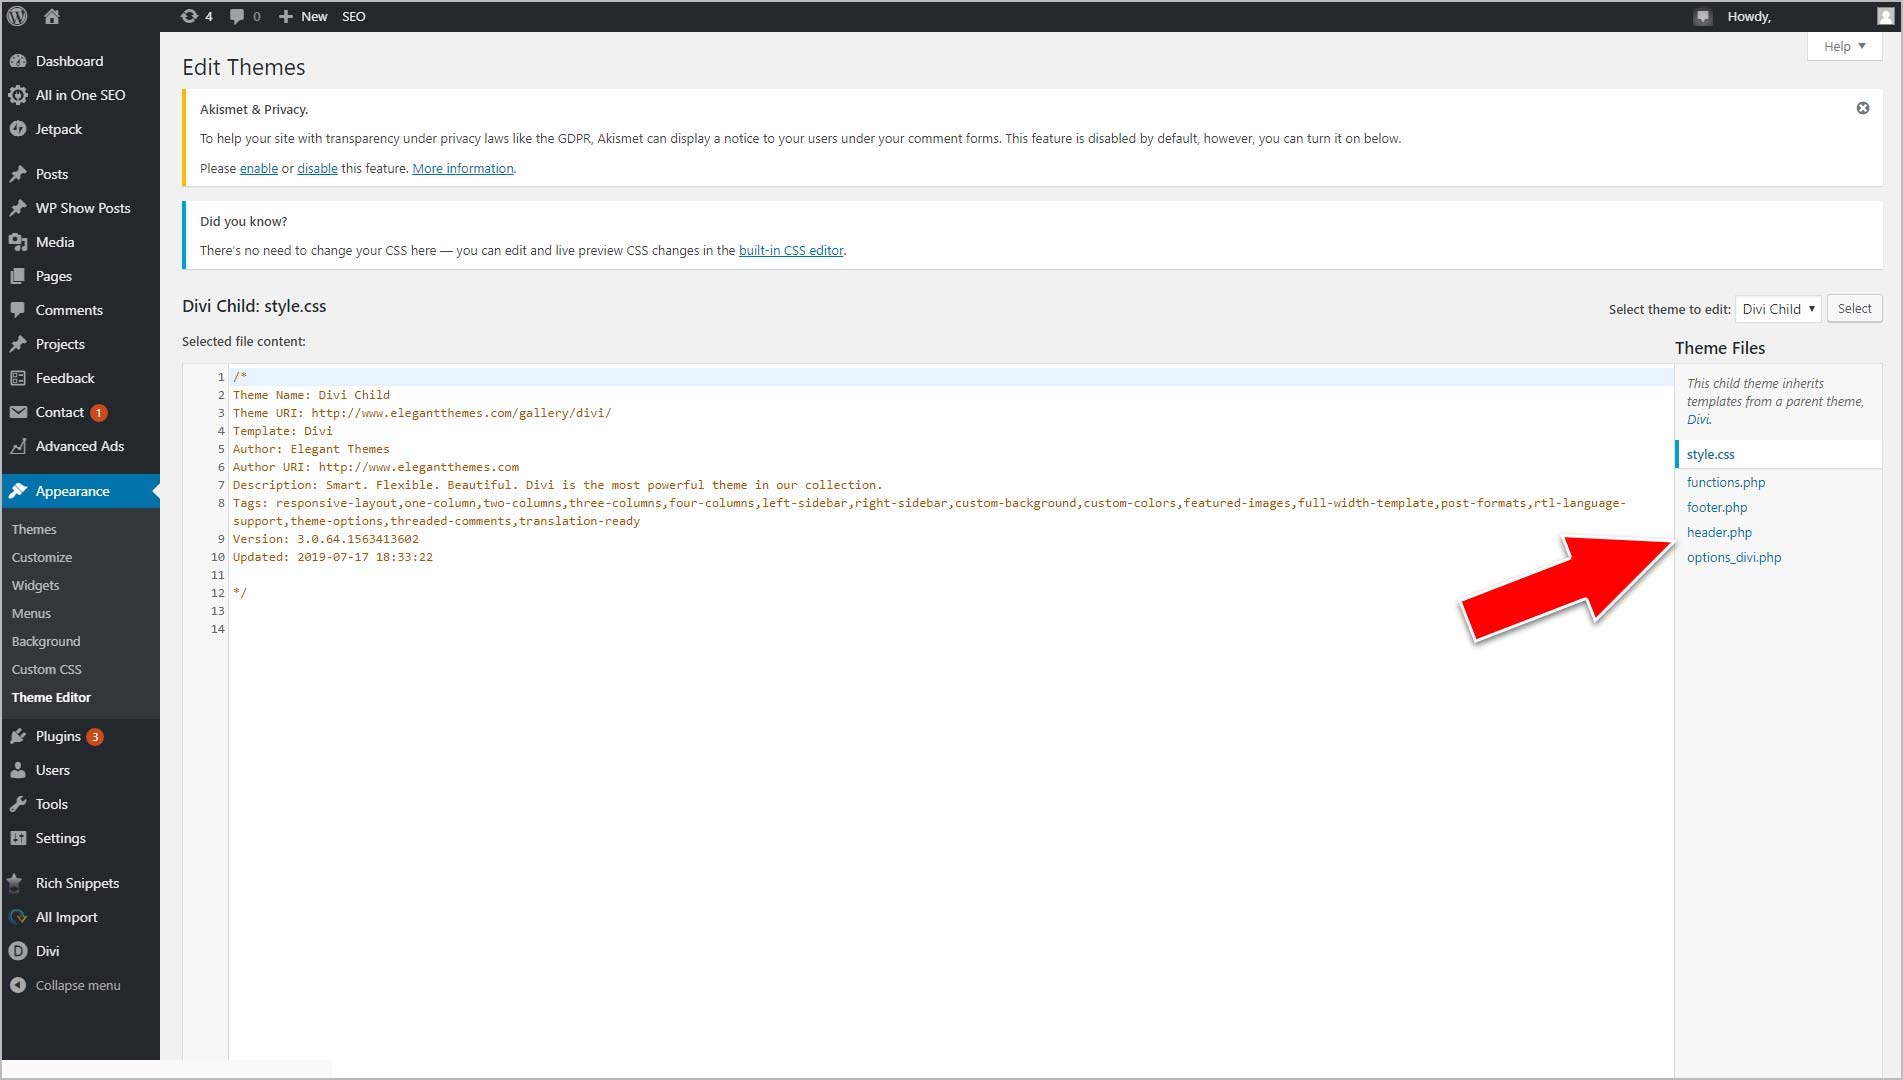
- Click on “header.php” from the right sidebar
Step 3: Paste in Your Analytics’ Script
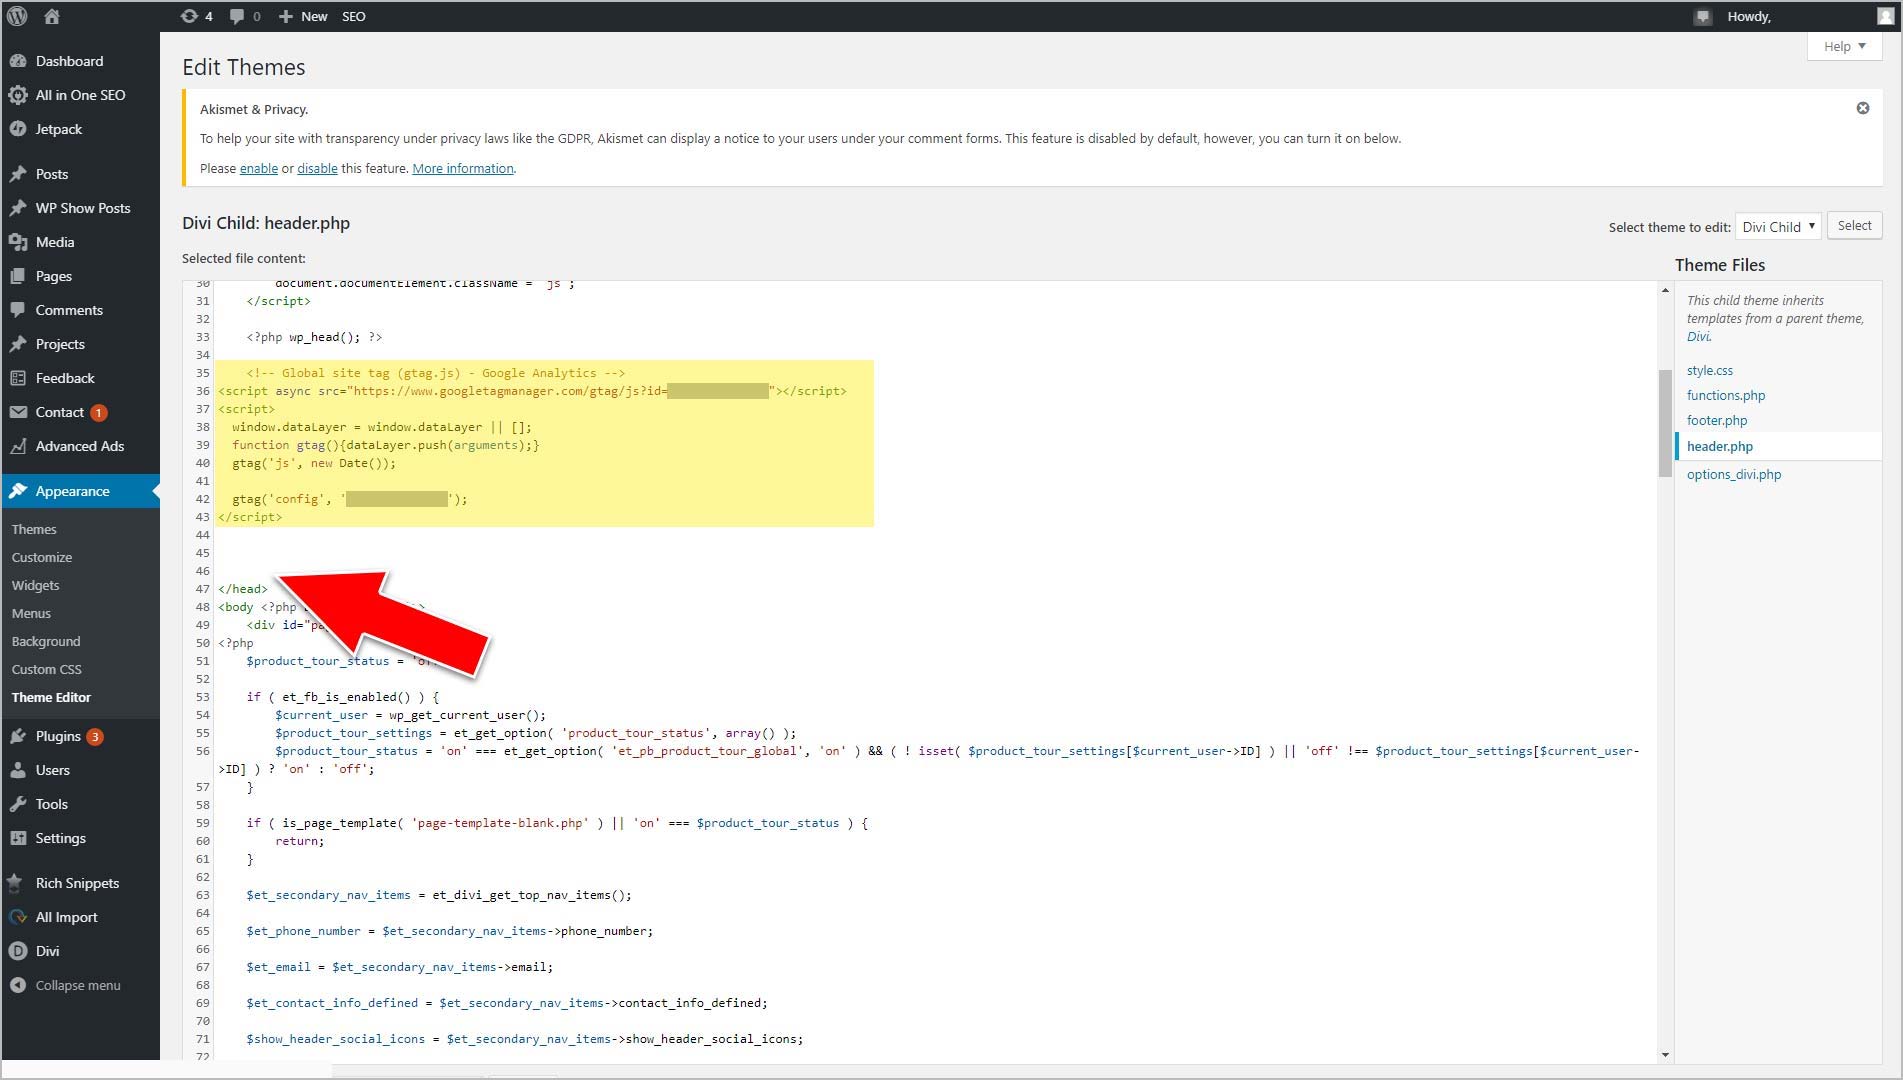
- To ensure all pages on your website are tracked, you need to find and place the script above it
- When placed, click on the blue “Update file” button below the content box
Option 2: Add Analytics Script via Plugin
While there are a number of plugins that will allow you to facilitate the installation of Google Analytics, for the purposes of this demonstration we’re using a very popular option called ‘Insert Headers and Footers Plugin’. Please note that you do not want to have multiple Analytics scripts on your WordPress installation. If you do you will skew the data. So be sure to pick either Option 1 or Option 2. Do not do both.
Step 1: Install ‘Insert Headers and Footers Plugin’
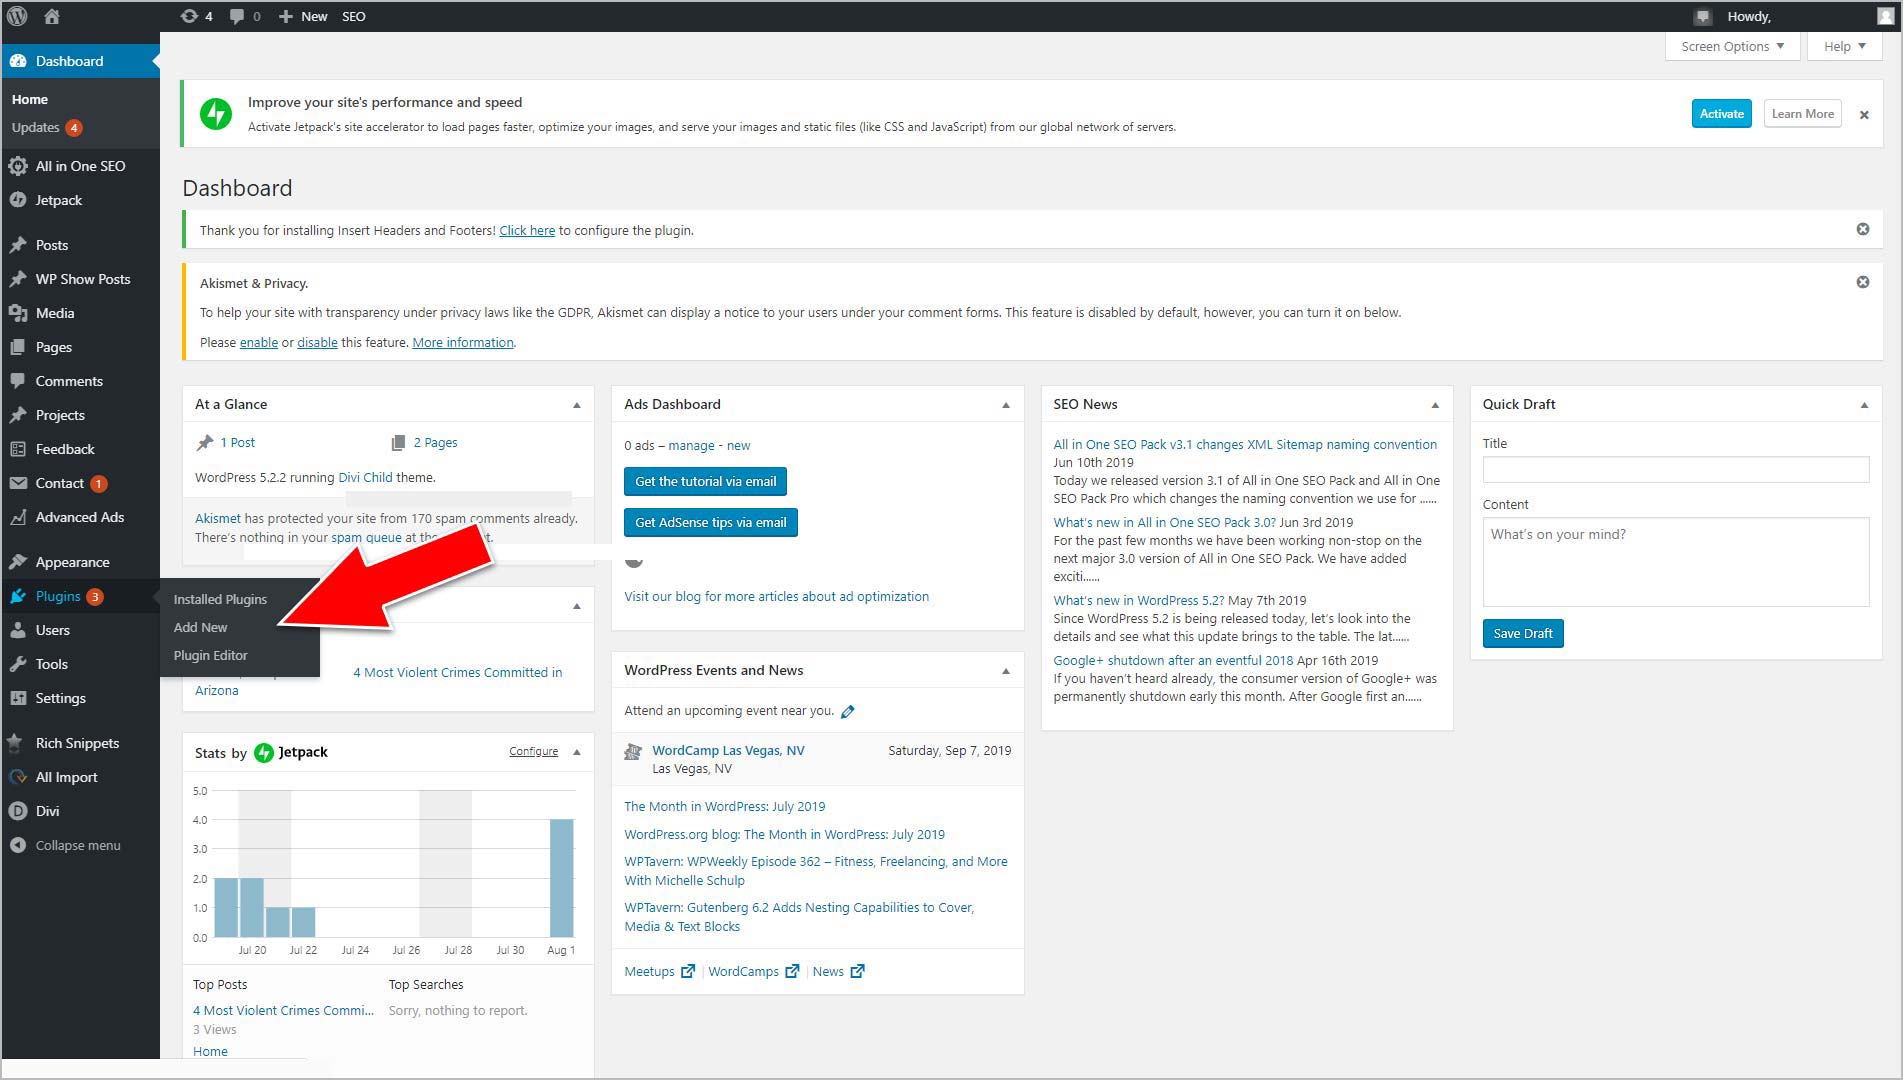
- Hover over “Plubins” and click on “Add New”
Step 2: Search for header and footer
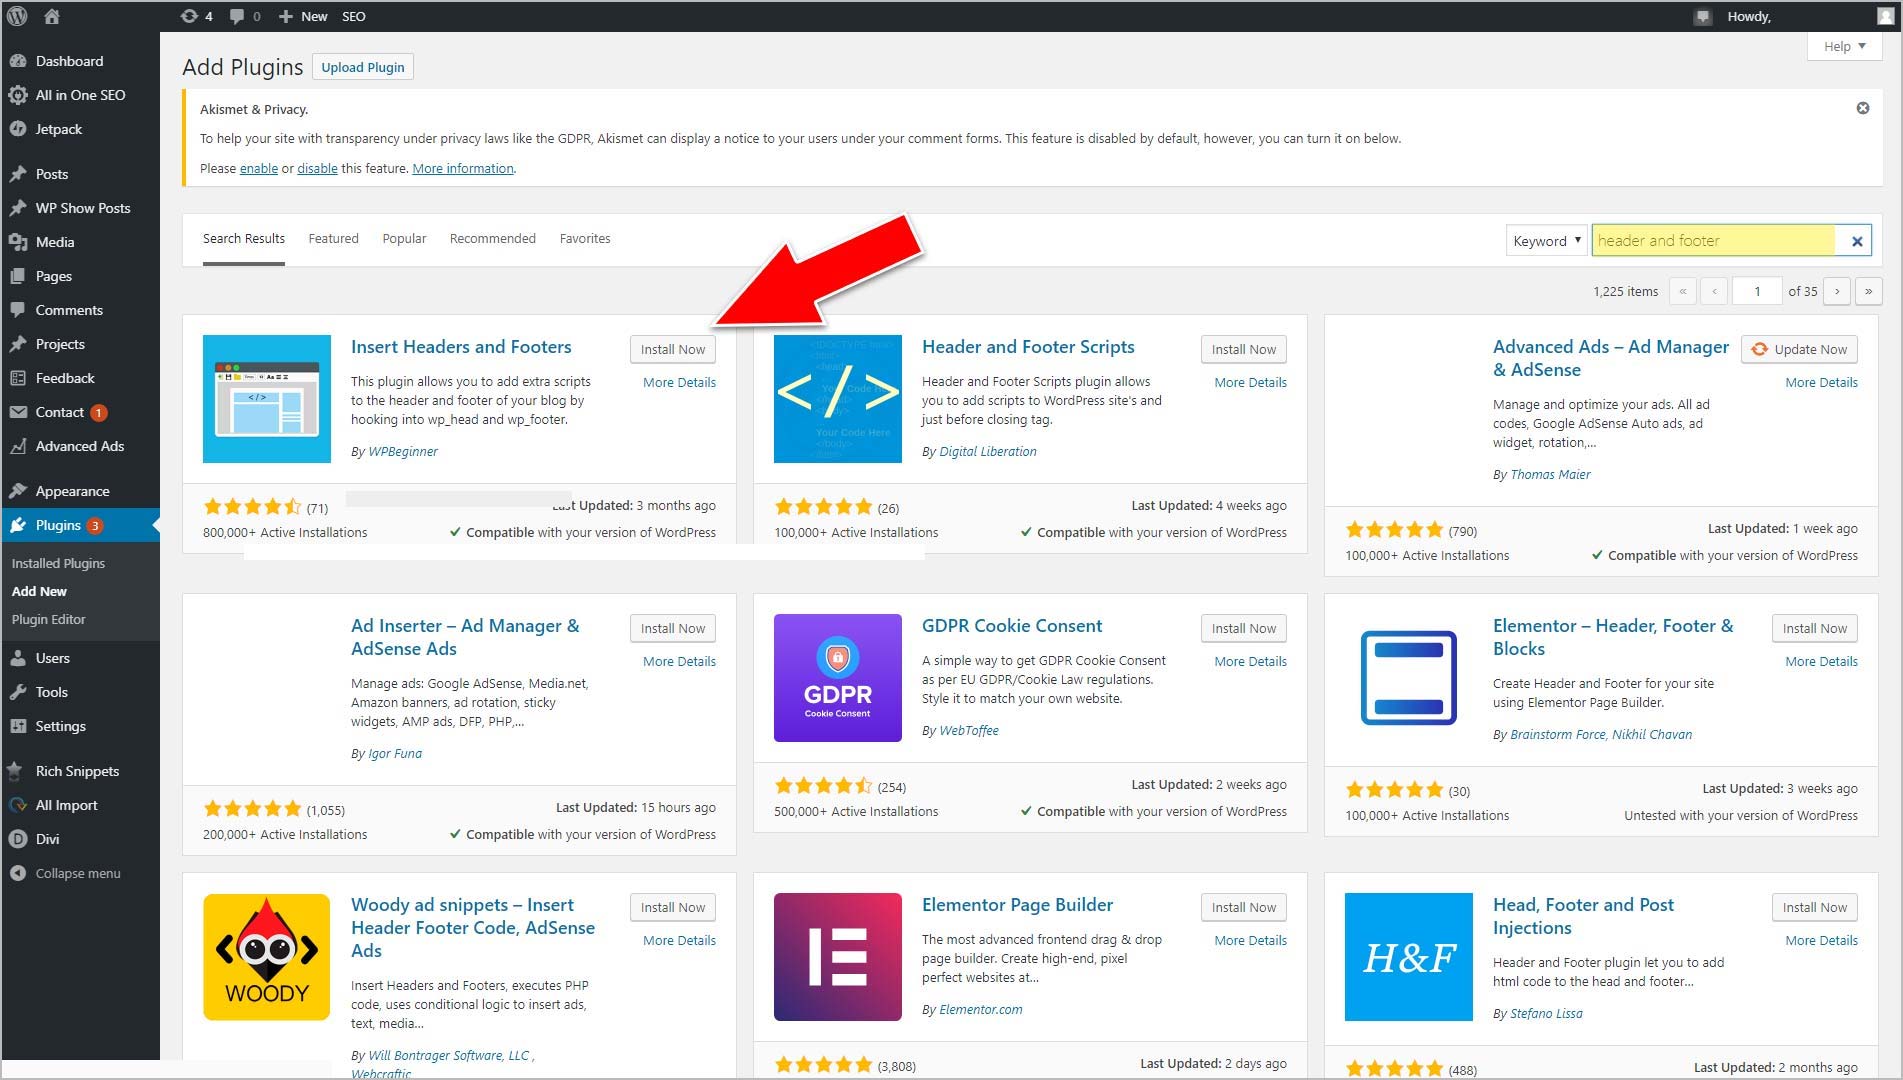
- Use the search box in the top right side of the page to look for header and footer
- Locate ‘Insert Headers and Footers’ by WPBeginner and click “Install Now”
- When installed, the “Install Now” button will turn to a blue “Activate” button – click to activate
Step 3: Navigate to ‘Insert Headers and Footers’
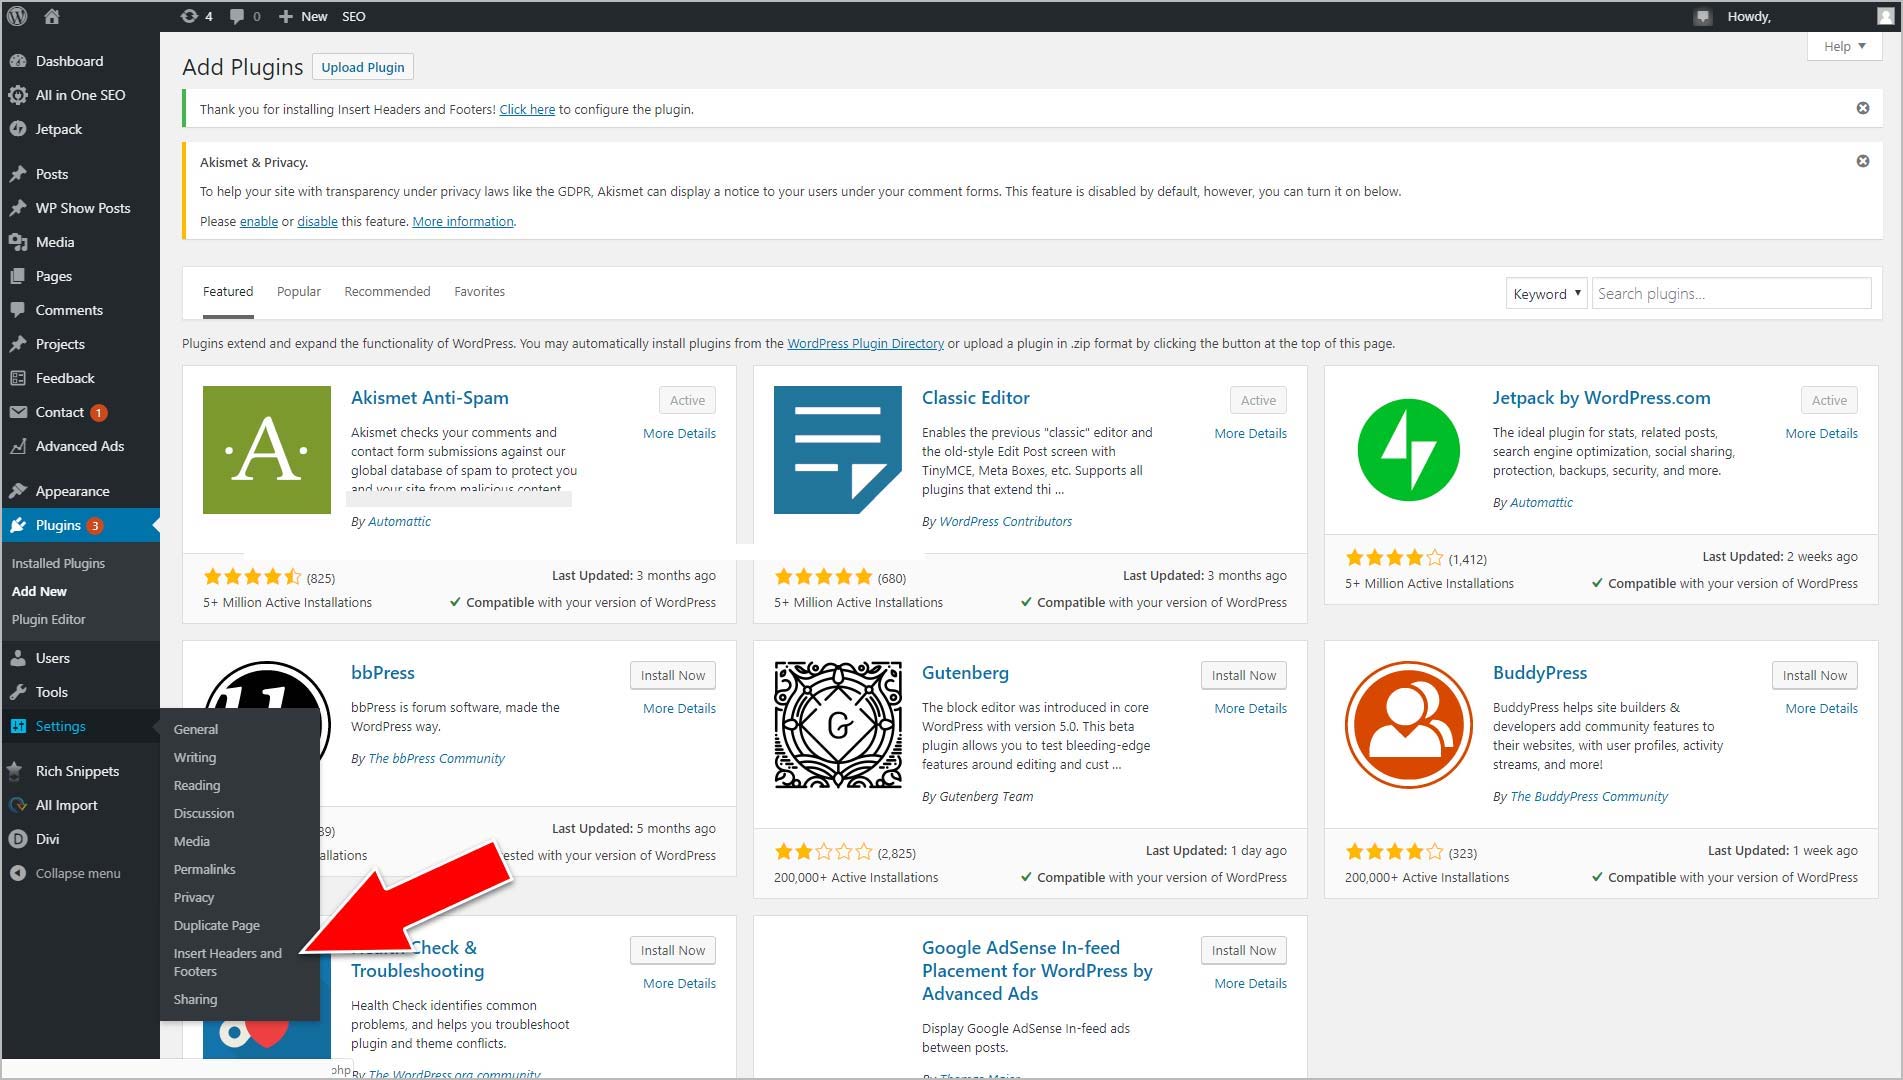
- Hover over “Settings” and click on “Insert Headers and Footers”
Step 4: Paste in Your Google Analytics’ Script
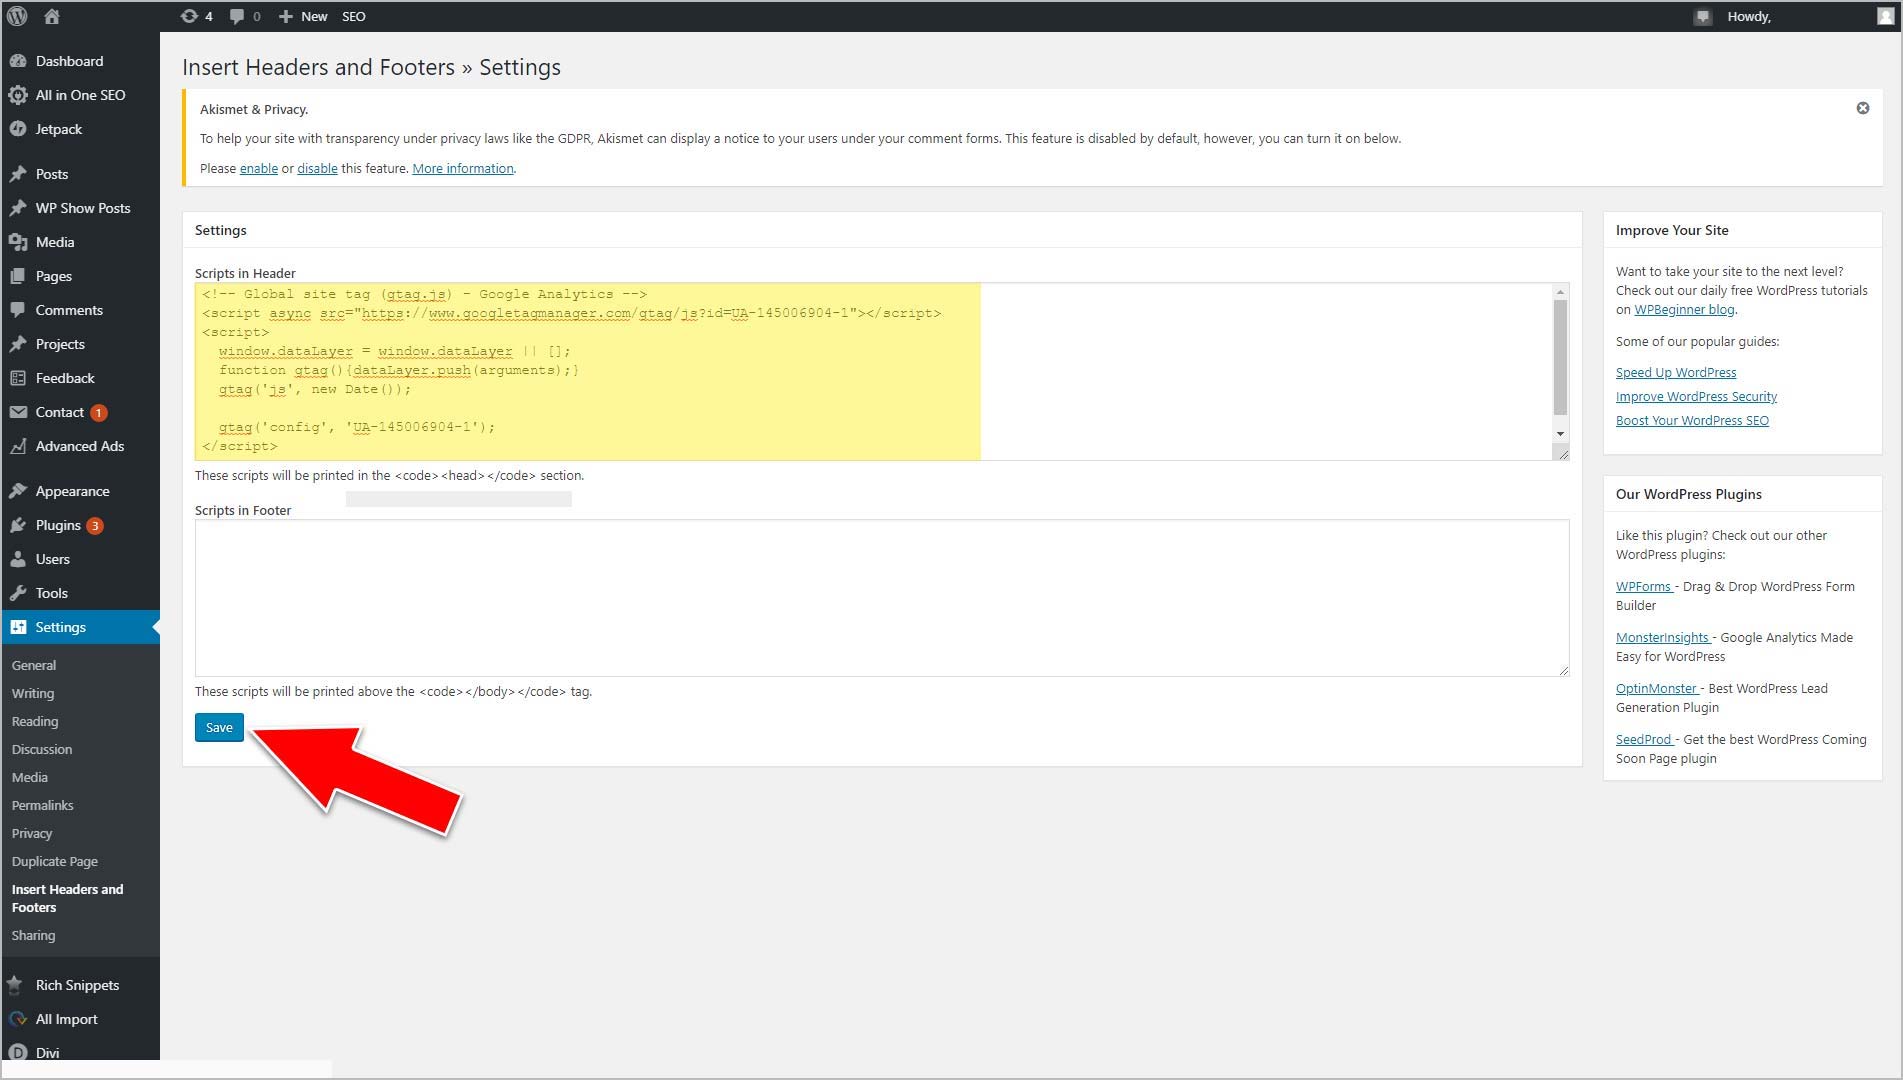
- On the ‘Insert Headers and Footers’ page, paste your Analytics’ script into the first box (under “Scripts in Header”)
- When done, click on the blue “Save” button
Voila! All Done
That’s it! Shortly your website will begin sending all sorts of pertinent data to Google Analytics, including key metrics for gauging performance – Audience, Acquisition, Behavior, and Conversion information.
Conclusion
While this guide is short and sweet, so too should setting up Analytics be. In order to check to ensure your website is communicating to Analytics, you can use a free service called GA Checker that will confirm whether or not your script is found across every page of your site. If not, you have some kind of configuration issue. If you are having issues, please reach out to our website development team. We’ll gladly help you get back on track. Click here to contact us via email or use the comment form found below to ask any questions you may have. Thanks for reading!
